 ultimate-guide
How to Tell Quality Camping Gear: A 2026 Buyer's Guide
Table of Contents
- What You'll Need to Evaluate Camping Gear
- The BIFL Testing Method: How to Spot Quality Camping Gear That Lasts
- What to Look for in a Tent: Seams, Zippers, and Weather Ratings
- Best Camping Gear Brands: What Separates Them from the Rest
- How to Maintain Camping Equipment for Long-Term Use
- Counterfeit Identification and Used Gear Inspection Checklist
- Environmental Impact of Gear Maintenance and Warranty Coverage
- Common Mistakes to Avoid When Buying Camping Gear
- Frequently Asked Questions
Last Updated: September 16, 2026
What You'll Need to Evaluate Camping Gear
Learning how to tell quality camping gear comes down to inspecting a few measurable details: fabric denier, stitch density, seam construction, zipper gauge, and waterproof ratings. This guide from Survive Nation walks through each one so you can judge gear on evidence rather than marketing claims.
The BIFL Testing Method: How to Spot Quality Camping Gear That Lasts
The "Buy It For Life" method scores gear on five criteria: material denier, stitch density, seam sealing, hardware quality, and repairability. Anything scoring well on all five tends to outlast its warranty by years.
Material Durability: Denier, Ripstop, and Stitch Density
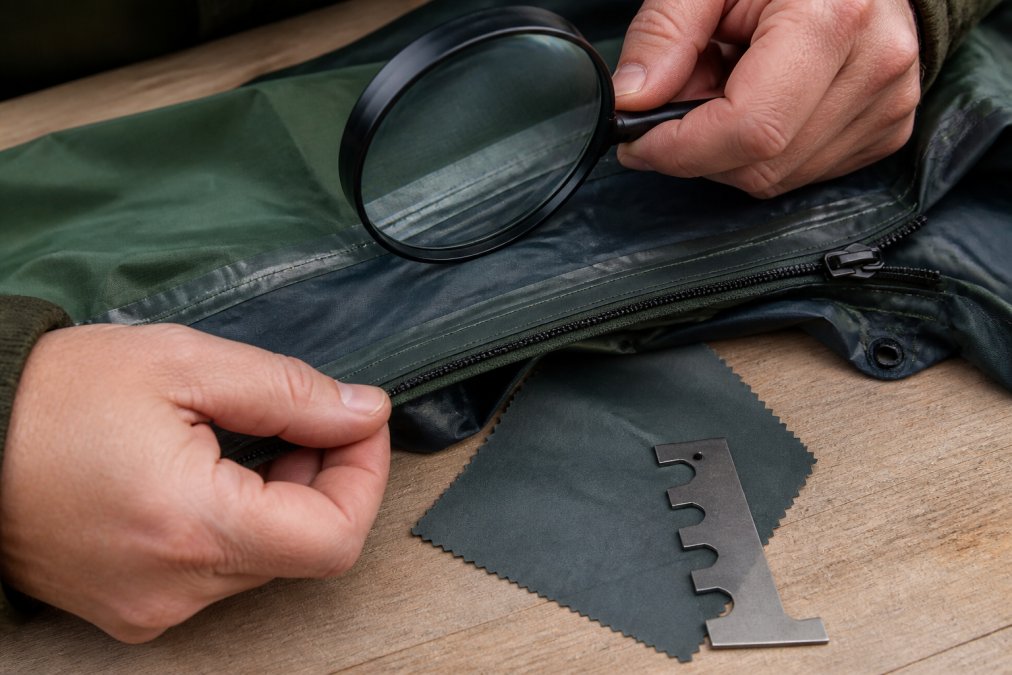
Denier is the unit measuring fiber thickness in a woven fabric; higher denier means heavier, more abrasion-resistant material. Ripstop weaves add a grid of reinforcing threads that stop small tears from spreading. Stitch density matters just as much: 8-10 stitches per inch signals a durable seam, while sparse stitching invites failure under load.
Weight-to-Performance Ratio and Packability
Light gear is not automatically good gear. A true ultralight tent still needs a hydrostatic head rating high enough to shed real rain. Weigh the packed footprint against what it actually delivers: a 1.5 kg shelter that pitches in wind beats a lighter one that collapses. Packability is a design outcome, not a spec sheet number, so test whether the stuff sack actually closes without a fight.
| Criterion | What to Check | Why It Matters |
|---|---|---|
| Denier | Fabric spec tag | Higher denier resists abrasion |
| Stitch density | Count stitches per inch | Dense seams hold under load |
| Seam sealing | Tape on interior seams | Prevents leaks at stress points |
| Zipper gauge | Coil size and pull weight | Heavier coils resist jamming |
| Repairability | Patch kit included | Field repairs extend lifespan |
What to Look for in a Tent: Seams, Zippers, and Weather Ratings
The three things that decide whether a tent lasts are seam construction, zipper gauge, and waterproof rating. Check all three before you commit.
Best Camping Gear Brands: What Separates Them from the Rest
The best camping gear brands are not the ones with the loudest marketing, they are the ones that publish enough data for you to verify their claims. A brand confident in its construction will hand you the numbers. A brand hiding behind lifestyle photography usually will not.
- Published fabric specs. Can you find denier, fabric weight (in ounces per square yard or grams per square meter), and coating type on the product page or spec sheet? If a tent lists "ripstop polyester" with no denier, that is a red flag.
- Hydrostatic head ratings. Rainfly and floor ratings should be listed separately, in millimeters (mm). A floor rated under 1,500 mm is a fair-weather floor; 3,000 mm and up is where all-season shelters tend to live.
- Stated stitch density or seam construction. Brands that tape or weld seams usually say so. Brands that only say "reinforced" usually mean bar-tacked at stress points and nothing more.
- Hardware disclosure. Anodized aluminum poles, YKK zippers, and DAC or comparable pole sets are named because they are selling points. Unnamed hardware is a cost-cutting tell.
- Warranty language that names parts. A warranty that explicitly covers seams, zippers, and pole failure is worth more than a vague "lifetime" promise that excludes "normal wear."
How to Read a Warranty Like a Spec Sheet
Warranty coverage is the closest thing to a manufacturer's own durability prediction. Read it the way you would read a hydrostatic head rating, look for what is excluded, not what is promised.
- "Lifetime" without definitions often means the lifetime of the product line, not your ownership. Ask what triggers a claim.
- Zipper and seam exclusions are the most common carve-outs, and they are also the two failure points that matter most in the field.
- Repair-first policies, where the brand patches or replaces a panel instead of shipping a whole new unit, signal that the company expects the gear to be serviceable.
- Proof-of-purchase requirements matter if you buy used. Without a receipt, most warranties are void, which is why the used-gear checklist later in this guide matters.
The Spec-Sheet Test
Before you buy from any brand, open the product page and try to answer these five questions in under two minutes:
| Question | Good Answer | Warning Sign |
|---|---|---|
| Fabric denier listed? | Yes, with coating type | "Heavy-duty fabric" |
| Hydrostatic head listed? | Separate fly and floor numbers | Single vague "waterproof" claim |
| Zipper brand or gauge named? | YKK, or coil size stated | "Durable zippers" |
| Pole material named? | Anodized aluminum, alloy grade | "Lightweight poles" |
| Warranty parts named? | Seams, zippers, poles | "Covers defects" only |
How to read a hydrostatic head rating
How to Maintain Camping Equipment for Long-Term Use
Most gear does not die from hard use, it dies from storage. The maintenance habits below are the difference between a tent that lasts three seasons and one that lasts fifteen, and they double as a repairability test: if you cannot perform these steps on a piece of gear, it was not built to be kept.
The Four Failure Modes to Watch
Every long-term gear failure traces back to one of these:
- Hydrolysis of polyurethane coatings. PU coatings absorb moisture from humid air and break down from the inside. This is why a tent stored damp in a garage for a year can delaminate even if it was never rained on.
- UV degradation. Nylon and polyester lose tensile strength with sun exposure. A rainfly left pitched for a full summer can lose a meaningful fraction of its tear strength.
- Seam tape failure. Tape adhesive dries out and lifts, usually starting at the highest-stress points, pole sleeves and guy-line anchors.
- DWR exhaustion. The durable water repellent on the face fabric wears off with abrasion and detergent residue, causing the fabric to "wet out" even though the membrane behind it is still intact.
Field Repair Kit: What Actually Earns Its Weight
A repair kit is only useful if you have practiced with it. Build one around these items and test each one at home before you rely on it:
- Tenacious Tape or comparable patch for tent and sleeping pad punctures. Clean the surface with alcohol first; patches fail on dirty fabric.
- Seam grip or silicone sealant in a small tube for re-taping lifted seams in the field.
- Spare zipper slider sized to your most-used zipper. A failed slider is the most common zipper failure, and it is replaceable without replacing the zipper.
- Pole splint or ferrule for aluminum pole breaks. A splint turns a trip-ending break into a ten-minute fix.
- Dental floss or heavy thread and a needle for stitching repairs on packs and stuff sacks.
Seasonal Inspection Checklist
Run this inspection at the start and end of every season. It takes about twenty minutes per major item and catches the failures that turn into mid-trip emergencies.
- Pitch the tent and inspect every seam for lifted or peeling tape
- Check the rainfly and floor for delamination, look for bubbling or a plastic film separating from the fabric
- Test every zipper through its full range, including the rainfly and vestibule zippers
- Inspect pole sections for cracks, bent ferrules, and lost shock cord tension
- Check guy lines and stake loops for UV brittleness, if the cord snaps when bent, replace it
- Reapply DWR if water no longer beads on the fly
- Weigh the packed item against its original spec; a sudden weight gain usually means absorbed moisture
Eco-Friendly Maintenance vs. Replacement
The most sustainable piece of gear is the one you already own. Re-taping a seam and reapplying a DWR treatment uses a fraction of the resources of manufacturing a replacement shelter, and it keeps coated fabrics out of landfills where they do not break down.
PFAS-free DWR treatments explained
Counterfeit Identification and Used Gear Inspection Checklist
Counterfeit gear often copies the look of a premium brand while using lower-denier fabric and untaped seams. Before buying used equipment, run this inspection checklist:
- Check denier and fabric weight against the manufacturer's published spec
- Inspect all seams for intact seam tape and even stitch density
- Test every zipper through its full range for snags
- Look for delamination or bubbling on waterproof coatings
- Confirm the hydrostatic head rating on the label matches the model
- Verify hardware: anodized aluminum poles should not flex or corrode
- Ask for the original warranty card and proof of purchase
Environmental Impact of Gear Maintenance and Warranty Coverage
Maintaining gear is the single most effective way to reduce its environmental footprint. Every repaired zipper and reapplied DWR coating keeps another piece of equipment out of a landfill and avoids the resource cost of manufacturing a replacement.
Common Mistakes to Avoid When Buying Camping Gear
The biggest mistake is buying on price alone without checking construction. Cheap gear usually fails at the seams and zippers first, exactly where repair is hardest.
Other frequent errors:
- Assuming higher price means higher denier fabric
- Ignoring stitch density because it isn't on the hangtag
- Skipping the warranty fine print on zipper and UV coverage
- Storing gear compressed, which destroys loft and promotes delamination
- Trusting a waterproof rating without checking breathability
Frequently Asked Questions
What materials indicate durability in camping gear?
Look for high-denier fabrics like 210D or 420D ripstop nylon or polyester. Ripstop weave prevents tears from spreading. Seam-sealed construction and DWR coatings add water resistance. Stitch density of 8-10 stitches per inch signals strong construction. Anodized aluminum poles resist bending and corrosion. These materials cost more but last through repeated use, making them a better value than cheaper alternatives that fail after a few trips.
Are expensive camping gear brands always better?
No. Price often reflects marketing and brand prestige, not just materials. Some mid-range brands use the same denier fabrics and seam-sealing techniques as premium ones. Evaluate gear on measurable specs: hydrostatic head rating, zipper gauge, stitch density, and warranty terms. A $200 tent with 5,000mm waterproof rating and a lifetime warranty may outperform a $500 tent with similar specs and a one-year warranty. Focus on construction details, not logos.
What should I look for in a warranty when buying camping gear?
Prioritize lifetime warranties that cover defects in materials and workmanship. Check if the warranty covers seam failure, zipper breakage, and pole bending. Some brands offer repair services instead of replacements, which extends gear life. Read exclusions carefully: normal wear and tear, UV degradation, and improper storage are often excluded. A strong warranty signals the manufacturer trusts their quality control. Keep your receipt and register your product to ensure coverage.
How can I tell if a sleeping bag is high quality?
Check the fill power for down bags (600+ is good, 800+ is excellent) or the denier and loft for synthetic bags. Look for baffled construction that prevents down from shifting. A quality sleeping bag has a durable water-repellent finish, draft collars, and a snag-free zipper with a guard. The shell fabric should be at least 20D ripstop nylon. Temperature ratings should follow the EN 13537 or ISO 23537 standard for accurate comfort ratings.
Buying gear you can trust starts with knowing what to inspect. Survive Nation offers sleeping bags, food storage, and outdoor lighting built for both wilderness trips and home emergency kits, backed by a fast, user-friendly shopping experience and a customer-service team with years of industry expertise. Shop now with Survive Nation and gear up with equipment that holds up when it matters.