 ultimate-guide
Essential Gear for Disaster Preparedness Kits
Table of Contents
- Why a Disaster Preparedness Kit Matters
- Building Your 72-Hour Emergency Kit Checklist
- Emergency Food Storage Guidelines
- Water Purification Methods for Emergencies
- Storage Solutions and Organization
- Maintenance and Rotation Schedules
- Budget-Friendly vs. Premium Kit Options
- Frequently Asked Questions
Last Updated: September 30, 2026
Why a Disaster Preparedness Kit Matters
A disaster preparedness kit gives your household the supplies needed to survive the critical first 72 hours after a major event, making disaster preparedness kits essential for every family. Power outages, severe weather, earthquakes, and flooding happen. Families with a prepared emergency supplies kit recover faster and experience less panic when disaster strikes.
When utilities fail, roads become impassable, or emergency services are overwhelmed, you need water, food, first aid supplies, communication tools, and shelter materials on hand. Building one takes a few hours.
At Survive Nation, we help families and outdoor enthusiasts assemble kits that actually work when they're needed. Our selection of reliable gear ensures you have the essentials at affordable prices.
Building Your 72-Hour Emergency Kit Checklist
A 72-hour emergency kit is the foundation of household preparedness, covering the critical period when emergency services are stretched thin and supply chains are disrupted.
Water and Hydration Supplies
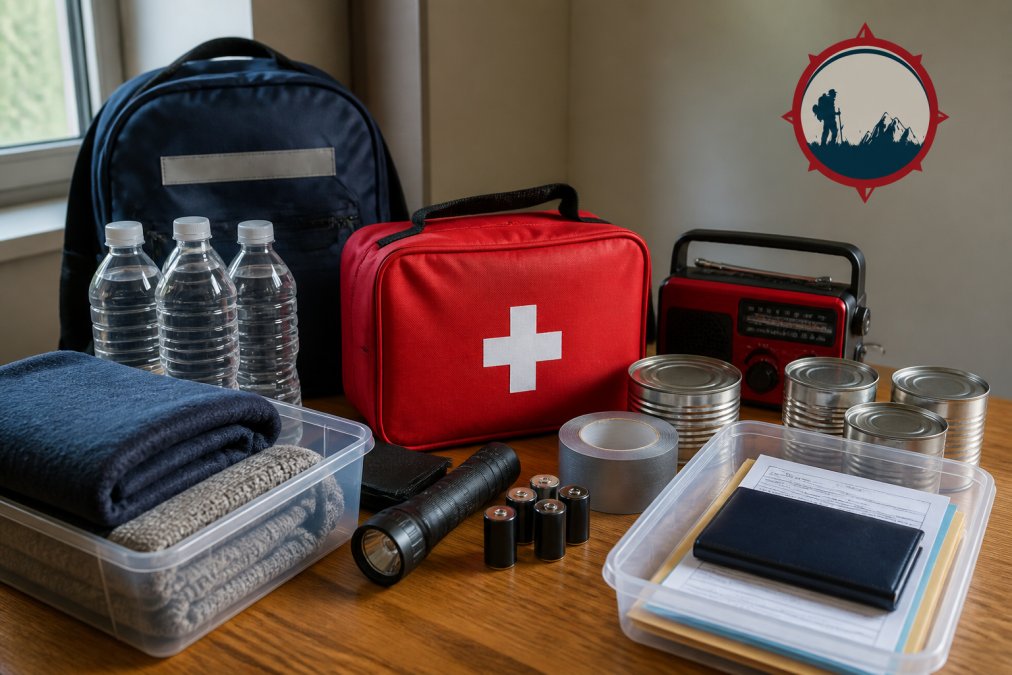
Store at least one gallon of water per person per day. Bottled water is shelf-stable and requires no preparation. Store it in a cool, dark place away from direct sunlight. Water purification tablets or a portable water filter extend your supply if needed.
Non-Perishable Food and Nutrition
Pack foods that require no cooking: canned goods, energy bars, nuts, dried fruit, and peanut butter. Include a manual can opener. Choose foods your family actually eats and account for dietary restrictions or allergies.
First Aid and Medical Supplies
Include bandages, gauze, antibiotic ointment, pain relievers, and anti-diarrheal medication. Store a 30-day supply of prescription medications and rotate regularly. Include a list of medications, dosages, and allergies. For chronic conditions, add insulin, inhalers, or EpiPens as needed.
Communication and Signaling Devices
Include a battery-powered or hand-crank radio for emergency broadcasts, a NOAA weather radio for alerts, a whistle for signaling rescuers, a battery-powered phone charger, and a flashlight with extra batteries.
Lighting and Power Sources
Include at least one flashlight per household member with extra batteries stored separately. Hand-crank flashlights eliminate battery dependency. A battery-powered lantern provides area lighting; glow sticks offer safe, no-heat light for children or tight spaces.
Sanitation and Hygiene Essentials
Include hand sanitizer, wet wipes, toilet paper, plastic bags, soap, toothbrush, toothpaste, and feminine hygiene products. A basic latrine setup (bucket, seat, bags) prevents disease when plumbing fails. Add antacids, cold medicine, and allergy medication.
Important Documents and Personal Records
Store copies of identification, insurance policies, bank account information, property deeds, and photos of your home in a waterproof container. Include emergency contact lists, medical records, and vaccination histories. Back up digital files on a USB drive or external hard drive.
Clothing and Bedding Gear
Include extra clothing appropriate for your climate, sturdy shoes or boots, a space blanket, a sleeping bag rated for winter temperatures, and work gloves.
Emergency Food Storage Guidelines
Beyond your 72-hour kit, store foods with shelf lives of one to five years: canned goods, freeze-dried meals, and emergency rations. Rotate stock regularly using the oldest items first. Keep a written inventory with expiration dates. Store in a cool, dark place away from temperature swings, moisture, and pests.
Water Purification Methods for Emergencies
Boiling water for one minute kills most pathogens; keep a camping stove in your kit. Water purification tablets are lightweight and shelf-stable. Portable water filters remove particles but require replacement cartridges. Combination approaches work best: filter first, then use tablets or boiling.
Storage Solutions and Organization
Strategic placement, organization, and redundancy ensure your disaster preparedness kit is accessible during an emergency.
Kit Types and Placement Strategy
Home Base Kit (Stationary): Use a large plastic storage bin (18-27 gallons) with a tight-fitting lid. Label clearly with "EMERGENCY KIT," assembly date, and last maintenance check. Store in an accessible location: bedroom closet, hallway closet, pantry, or garage shelf near the entrance. Avoid attics, flood-prone basements, or outdoor sheds.
Container Organization
Use multiple smaller containers within your main kit organized by category: Water & Hydration, Food & Nutrition, First Aid & Medications, Lighting & Power, Communication & Signaling, Sanitation & Hygiene, Documents & Records, Clothing & Bedding, and Tools & Multi-Purpose.
Climate and Environmental Considerations
Temperature: Avoid attics, hot garages, and direct sunlight. A basement or interior closet maintains stable temperatures. In hot climates, rotate water and food every 4-6 months.
Quick-Access Organization
Organize your main kit with critical items accessible without unpacking everything: flashlight, whistle, hand-crank radio, and phone charger on top; water and food on the second layer; first aid, medications, and documents in the middle; clothing, blankets, and tools on the bottom.
Redundancy and Distributed Storage
Maintain multiple kits for redundancy: a home kit (primary supply), vehicle kit (if away from home), and workplace kit (if at work during disaster). You do not need identical kits; a vehicle kit can be smaller and a workplace kit can focus on essentials.
Inventory and Documentation
Maintain a written inventory stored inside the kit and in digital backup. Include item names, quantities, purchase and expiration dates, kit location, last maintenance check date, and special notes. This ensures systematic rotation and helps household members know what's inside and where to find it.
Maintenance and Rotation Schedules
Disaster preparedness kits are only effective if their contents remain viable. Systematic maintenance transforms a kit from a one-time purchase into a living resource that stays ready.
Rotation Schedule by Item Type
Water: Rotate every six months. Mark dates on containers and use oldest water first for cleaning or watering plants. Add 1/8 teaspoon unscented bleach per gallon to extend shelf life. Test containers for leaks or cracks.
Creating a Maintenance Checklist
Write a simple one-page checklist that lists every category in your kit and what to check:
- Water: Date marked? Containers intact? Bleach added if applicable?
- Food: All items within expiration date? Packages undamaged?
- Batteries: All devices tested and working? Extras stored separately?
- Medications: All items current? Prescriptions updated?
- First Aid: Supplies intact and dry? Expired items removed?
- Documents: Current and readable? Contact list up to date?
- Clothing/Bedding: Items present and in good condition?
- Tools: All functional? Corrosion or damage?
Setting Reminders
Use calendar reminders on your phone or paper calendar to prompt maintenance checks. Many households choose:
- Spring (March/April): Full kit inspection after winter storage
- Fall (September/October): Refresh before severe weather season
- Medication refill dates: Rotate prescription backups when you refill prescriptions
- Battery replacement day: Pick one date annually (e.g., first Sunday in March) to replace all batteries household-wide
Involving Family Members
Maintenance is an opportunity to reinforce preparedness awareness. Children can help rotate food, check expiration dates, and test flashlights. Assign age-appropriate tasks: younger children can help count items and verify nothing is damaged; older children can help update contact lists and organize supplies.
Budget-Friendly vs. Premium Kit Options
Building a disaster preparedness kit doesn't require spending hundreds of dollars. A basic kit with essentials, water, food, first aid, flashlight, and radio, costs less than most people spend on a single restaurant meal per person. Premium kits with redundancy, specialty items, and higher-quality gear cost more but provide additional security.
Frequently Asked Questions
What are the 10 essential items for an emergency kit?
Every disaster preparedness kit needs water, non-perishable food, a first aid kit, a battery-powered or hand-crank radio, a flashlight with extra batteries, sanitation supplies, important documents, a multi-tool or knife, a whistle for signaling, and a space blanket. These items address your most critical survival needs: hydration, nutrition, communication, visibility, and protection from the elements.
What should be in a 72-hour emergency kit checklist?
A 72-hour emergency kit checklist includes one gallon of water per person per day, three days of non-perishable food, prescription medications, a NOAA weather radio, flashlights, batteries, first aid supplies, hygiene items, hand sanitizer, copies of important documents, cash, a map, work gloves, duct tape, and a fire extinguisher. This covers the essentials to sustain your household through the first critical period after a disaster strikes.
How do you store emergency water and food properly?
Store water in food-grade containers in a cool, dark place away from direct sunlight and chemicals. Replace stored water every six months. Keep non-perishable food in airtight containers or sealed packaging in a temperature-controlled area between 50-70°F. Avoid extreme heat and humidity. Follow emergency food storage guidelines by rotating stock regularly and checking expiration dates quarterly to ensure supplies remain safe and effective.
How often should you update your emergency preparedness kit?
Review and refresh your disaster preparedness kit twice yearly, ideally in spring and fall. Check expiration dates on medications, food, and water. Replace any used or damaged items, update important documents, and verify batteries still work. Rotate perishable items like food and water every six months. This maintenance schedule ensures your kit remains reliable when you actually need it.
What water purification methods work best for emergencies?
Water purification methods for emergencies include boiling (if fuel is available), water purification tablets, portable filtration straws, and gravity-fed filter systems. Boiling kills most pathogens but requires heat. Purification tablets are lightweight and compact. Filtration straws work for individual use. Gravity filters handle larger quantities. Include multiple methods in your kit since you may not know which resources will be available during an actual emergency.
What documents should be included in a disaster preparedness kit?
Include copies of insurance policies, property deeds, birth certificates, medical records, Social Security cards, and a list of emergency contacts. Store originals in a safe deposit box and keep copies in a waterproof container in your kit. Add a recent photo of each family member for identification purposes if separated. Keep a list of medications and dosages, and any special medical needs for household members.
Should I invest in a premium emergency kit or build a budget-friendly one?
Budget-friendly kits work well if you assemble them gradually and focus on essentials: basic first aid, canned food, water, and a flashlight. Premium kits offer higher-quality gear, better organization, and often include specialized items. The best choice depends on your household size, storage space, and comfort level with DIY assembly. Start with budget basics and upgrade specific items over time as your preparedness needs evolve.