 blog
blog
Buy Disaster Preparedness Kits Online: 2026 Guide
Table of Contents
- Why Buying Disaster Preparedness Kits Online Makes Sense in 2026
- What to Look for When You Buy Disaster Preparedness Kits Online
- 72-Hour Emergency Kit Essentials Every Household Needs
- Emergency Kit Checklist for Home: Room-by-Room and Vehicle Placement
- Customizing Your Kit for Climate, Family Size, and Specific Disasters
- Digital Document Security and Psychological Preparedness
- Maintenance, Expiration Checks, and Sustainability
- Frequently Asked Questions
Last Updated: September 22, 2026
Why Buying Disaster Preparedness Kits Online Makes Sense in 2026
When you buy disaster preparedness kits online, you get a curated set of survival gear delivered to your door without hunting through a dozen stores. That convenience matters more than most people admit. This guide from Survive Nation breaks down exactly what separates a kit worth owning from a box of filler.
What to Look for When You Buy Disaster Preparedness Kits Online
The most important thing to check is the contents list, not the box size. A large box with cheap filler is worth less than a compact kit with real supplies.
Look for these markers of a serious kit:
- Stated quantities per person, not vague "family-sized" claims
- Shelf-stable food and sealed water, with clear expiration dates
- A first aid kit with actual supplies, not just bandages
- A light source and backup power, such as a flashlight and portable power bank
- Communication gear, like an emergency radio or whistle
Pre-Made Kits vs. Building Your Own
Pre-made kits win on speed and price. Building your own wins on control. A common mistake is buying a pre-made kit and never checking what's inside it. If you go pre-made, verify the contents against your household size. If you build your own, you will likely spend more time but end up with gear you actually trust.
How to Read Kit Contents Without Getting Fooled by Filler
Filler shows up as cheap items that pad the count: tiny packets, single-use trinkets, and "survival" tools that bend on first use. Count the items that matter. If a kit lists 100 pieces but only a handful are food, water, or first aid, you are paying for cardboard.
72-Hour Emergency Kit Essentials Every Household Needs
A 72-hour kit covers the first three days after a disaster, when help may not reach you. That window is the benchmark most preparedness guidance is built around.
Food, Water, and the Shelf-Life Question
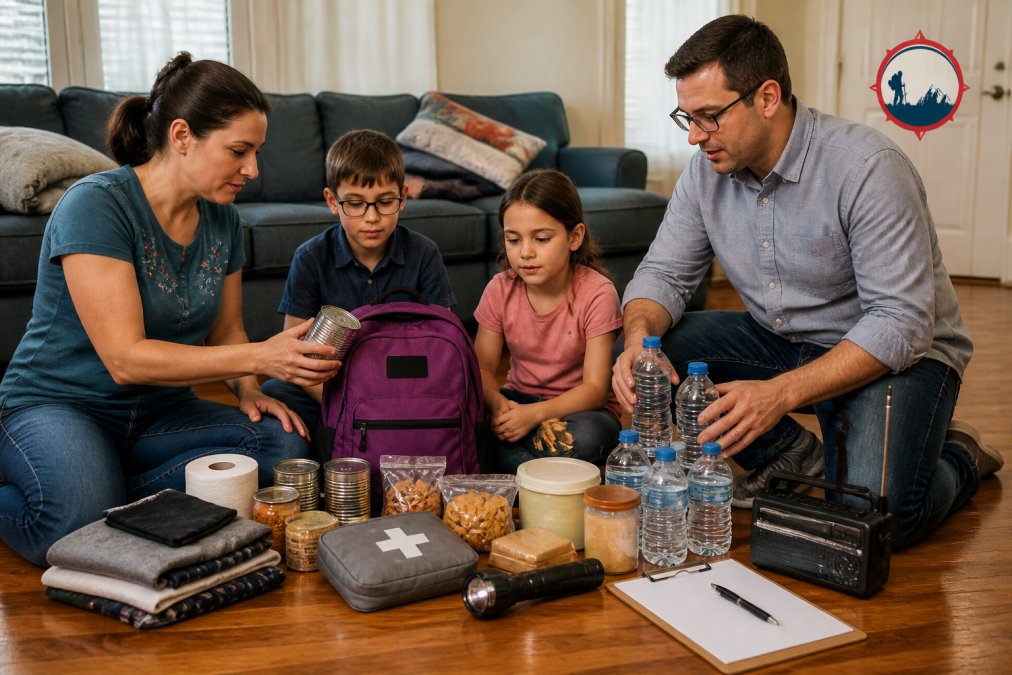
Plan on roughly one gallon of water per person per day and non-perishable food that needs no cooking. Freeze-dried food and emergency rations last longest when stored cool and dry. Check dates twice a year. A kit you never inspect is a kit you cannot rely on.
First Aid, Sanitation, and Communication Gear
First aid supplies, sanitation items, and a way to communicate form the backbone of any kit. Pack personal hygiene basics, a dust mask, and a multi-tool. Add an emergency radio and a portable power bank so you can get information when the grid is down.
Emergency Kit Checklist for Home: Room-by-Room and Vehicle Placement
An emergency kit checklist for home should place supplies where you can reach them in seconds, not where they look tidy. Store one kit near your main exit, one in the bedroom, and one in each vehicle.
| Location | What to Store | Why |
|---|---|---|
| Entryway closet | Full 72-hour kit, water, food | Fast grab-and-go during evacuation |
| Bedroom | Flashlight, shoes, whistle, dust mask | Reachable in the dark after a quake or storm |
| Vehicle | Blanket, water, first aid kit, multi-tool | Covers you if you are stranded on the road |
| Kitchen | Emergency rations, manual can opener | Access to food and water lines |
Where to Store Kits So You Can Actually Reach Them
Avoid the basement if you live in a flood zone, and avoid the attic in fire country. The best spot is one you can reach in the dark, on foot, in under a minute.
Customizing Your Kit for Climate, Family Size, and Specific Disasters
Generic kits ignore the one factor that decides whether your supplies actually work: where you live and what is most likely to happen there. A kit built for a mild climate fails in a deep freeze or a wildfire zone. This is the section most guides skip, so treat it as the core of your buying decision rather than an afterthought.
Build Around Your Most Likely Disaster, Not Every Disaster
Start by naming the two hazards most probable for your address, then size the kit to those. A hurricane kit and an earthquake kit overlap on food, water, and first aid, but they diverge sharply on everything else.
- Wildfire: N95 or P2 respirators for everyone, sealed goggles, a battery or hand-crank radio for evacuation orders, and a go-bag staged in the vehicle rather than the closet. Paper documents and medications go in a fire-resistant pouch. Water matters less than mobility, you may leave with minutes of notice.
- Hurricane and coastal storm: Waterproof dry bags for electronics and documents, a minimum of seven days of water rather than three (re-supply lines can stay down longer than the 72-hour benchmark assumes), tarps and cordage for temporary roof repair, and a shelter-in-place plan if evacuation is not ordered.
- Earthquake: Sturdy closed-toe shoes and work gloves stored beside the bed, a pry bar or multi-tool for shifting debris, and a whistle to signal for help. Assume no power and no running water for the first 72 hours.
- Tornado and severe wind: A helmet or hard hat for each person, a designated below-ground or interior-room shelter, and a kit that lives in that shelter rather than by the door.
- Winter storm and deep freeze: Extra insulation layers, hand warmers, an emergency blanket per person, a backup heat source rated for indoor use, and more calories than a summer kit, cold burns energy faster.
Size the Kit to the Household, Not the Box
Pre-made kits are usually priced and labeled for one to four people. Count every person and pet, then multiply food, water, and medication. A common pattern is a "4-person" kit that actually contains three days of food for two adults. Check the stated servings, not the headcount on the label.
Add these household-specific layers that standard kits rarely include:
- Infants: formula, bottles, diapers, wipes, and a baby carrier for hands-free evacuation.
- Pets: three days of food, a collapsible bowl, a leash or carrier, vaccination records, and a current photo in case you are separated.
- Medical needs: a seven-day supply of prescription medication rotated on a schedule, plus a written list of dosages and prescriber contacts.
- Older adults: spare eyeglasses, hearing-aid batteries, and a mobility aid if one is used.
- Access and functional needs: a written communication card if speech is affected, and backup charging for any powered medical device.
The Climate Adjustments Most Kits Ignore
Cold climates need extra insulation, hand warmers, and an emergency blanket per person. Hot, dry regions call for more water and sun protection, and electrolytes if you are working or moving in heat. Coastal areas should include waterproof storage and a shelter-in-place plan for storms. High-altitude and desert households should plan for wider temperature swings in a single day.
A Quick Customization Checklist
- Name your two most likely hazards.
- Count people and pets, then multiply food, water, and medication.
- Add the disaster-specific items above for your top two hazards.
- Add household-specific layers for infants, pets, medical needs, and access needs.
- Stage the kit where you will actually be when the hazard hits, not always the entryway closet.
Digital Document Security and Psychological Preparedness
Two angles most buyers never consider: protecting your vital documents and preparing your mind. Both matter as much as the gear in the box.
Maintenance, Expiration Checks, and Sustainability
A kit is only as good as its last inspection. The difference between a kit that works and a kit that fails is a schedule you actually keep. Set a recurring reminder every six months, a common pattern is to tie it to daylight saving time changes so you never forget, and work through the kit top to bottom.
What to Rotate, Test, and Replace
- Water: Commercially sealed water stays at its printed date; store it cool and dark. If you refill your own containers, rotate them every six months. Replace any water that smells or looks cloudy.
- Food: Check printed dates and pull anything within three months of expiring. Use the oldest items in normal meals and replace them, so nothing is wasted.
- Batteries: Test flashlights and radios, and replace alkaline batteries annually whether or not they were used. Rechargeable batteries should be cycled and recharged on the same schedule.
- First aid: Replace anything opened, expired, or discolored. Adhesive bandages lose adhesion over time, and sterile packaging can fail in heat.
- Medications: Rotate prescription supplies so you always hold a full seven-day buffer, and check for anything past its date.
- Documents: Confirm paper copies are still legible and that your digital copies still open and decrypt.
Digital Document Security: The Step Most Kits Skip
Your records need to survive even if your home does not. Scan passports, birth certificates, insurance policies, medical records, and a current photo of each household member and pet. Store encrypted copies in two places: a password-protected drive in your go-bag and a secure cloud account you can reach from any device. Keep paper copies in a waterproof pouch inside the kit as a fallback for when the grid is down.
A few practical rules:
- Use a password manager rather than reusing a single password across accounts.
- Enable two-factor authentication on the cloud account holding your records.
- Keep a written list of account logins somewhere a trusted family member can find it.
- Test that your encrypted drive opens on a device other than the one you created it on.
Sustainability Without Sacrificing Readiness
Sustainability fits here naturally, and it usually makes the kit cheaper to maintain over time. Choose rechargeable batteries and a hand-crank or solar emergency radio instead of disposable versions. Refill water containers rather than buying single-use bottles. Pick reusable sanitation options where practical, and store supplies in sturdy bins you can reuse rather than one-time packaging.
Frequently Asked Questions
Are pre-made disaster kits better than building your own?
Pre-made kits save time and ensure you do not forget critical items like a whistle or dust mask. Building your own lets you customize for allergies, pets, or climate. A practical middle ground is buying a base 72-hour emergency kit essentials set online, then adding personal items such as medications, spare glasses, and kid-friendly food. Check the contents list carefully so you are not paying for filler like cheap plastic ponchos.
How do I choose the right disaster preparedness kit for my family size?
Start with the 72-hour rule: one gallon of water per person per day, plus non-perishable food, for three days minimum. A household of four needs roughly 12 gallons of water and 36 meals. When you buy disaster preparedness kits online, look for kits labeled by person count or buy a base kit and add extra food and water separately. Do not forget pets, infants, and elderly family members in your count.
What should be included in a basic emergency kit checklist for home?
A home kit should cover water, food, first aid supplies, a flashlight with extra batteries, a battery-powered or hand-crank emergency radio, a multi-tool, sanitation supplies, personal hygiene items, copies of vital documents in a waterproof bag, and an emergency blanket. Keep one kit at home and a smaller version in each vehicle. Review the checklist every six months to swap expired food and batteries.
How often should I check expiration dates on my kit?
Set a recurring calendar reminder every six months. Check water pouches or bottles, food bars, batteries, and medications. Freeze-dried food and emergency rations often last five years or more, but water and batteries do not. Rotate items you can still use into your regular pantry and replace them. This keeps your kit ready without wasting money on supplies that expire unnoticed.
Disaster readiness comes down to one habit: preparing before you have to. At Survive Nation, we make that easier with reliable gear, a fast online shopping experience, and a customer-service team backed by years of industry expertise. Browse our emergency supplies, food storage, and outdoor lighting, then build a kit your household can actually count on. Get started with Survive Nation and shop now.