 blog
blog
Affordable Survival Gear for Home Preparation
Table of Contents
- Why Affordable Survival Gear Matters for Home Preparedness
- Best Survival Gear for Long Term Storage and Durability
- Budget Emergency Preparedness Checklist: What to Buy First
- DIY Home Survival Kit Essentials You Can Assemble Today
- Water Storage, Filtration, and Food Stockpile Basics
- Lighting, Power, and Communication for Home Emergencies
- Maintenance, Expiration Tracking, and Space-Saving Storage
- Conclusion
- Frequently Asked Questions
Last Updated: September 27, 2026
Why Affordable Survival Gear Matters for Home Preparedness
When a power outage hits or a storm rolls through unexpectedly, the difference between being ready and scrambling is measured in minutes. At Survive Nation, we've helped thousands of households build practical emergency kits without breaking the bank. The reality is simple: affordable survival gear doesn't mean compromising on quality or reliability. It means being strategic about what you buy first and understanding which items deliver the most value when things go wrong.
Most people delay building emergency supplies thinking it requires massive upfront investment. A functional kit starts small and grows over time. Water, first aid, lighting, and basic tools are available at reasonable prices. The goal is having essentials on hand so your family stays safe during disruptions.
This guide walks you through building practical, durable supplies that fit a realistic budget. We'll cover what to prioritize, how to organize it, and how to maintain your stockpile so nothing goes to waste.
Best Survival Gear for Long Term Storage and Durability
The best survival gear for long term storage combines material science with realistic shelf-life expectations. Not everything needs to last forever, but the items you're banking on should function reliably when you need them, which means understanding how and why gear fails in storage.
Material Selection and Degradation Prevention
Stainless steel resists rust better than carbon steel or iron, making it worth the modest premium for long-term storage. Waterproof containers prevent moisture infiltration that accelerates battery corrosion, medication breakdown, and food spoilage. Alkaline batteries stored cool and dry retain 80-90% charge after five years; zinc-carbon batteries are poor choices for emergency kits.
High-density polyethylene (HDPE) and polypropylene (PP) resist UV light and temperature swings better than low-density polyethylene (LDPE). Food-grade buckets are typically HDPE or PP. Avoid thin plastic bags; they become brittle over time. Glass containers work for dry goods but are heavy and breakable, practical for smaller items like medications, not bulk storage.
Environmental Factors That Degrade Gear
Temperature fluctuations accelerate material breakdown. Basements maintain stable temperatures (50-60°F year-round) and are superior to garages or attics. Attics in warm climates exceed 130°F, rapidly degrading medications, batteries, and synthetics.
Humidity above 60% promotes corrosion and mold growth. Silica gel packets absorb moisture in sealed containers. Replace annually or when saturated. Desiccant packs cost $0.50-$2.00 and are high-ROI storage additions.
Light exposure degrades certain materials. Ultraviolet light breaks down rubber, plastics, and some food nutrients. Store gear in opaque containers or in dark spaces. Transparent plastic bins look organized but expose contents to ambient light; consider labeling opaque containers clearly instead.
Testing and Rotation Schedules
Establish quarterly inspections. Test flashlights for dim output (corroded contacts or failing bulbs). Clean corroded battery terminals with a pencil eraser or vinegar-soaked cloth. Verify sealed containers remain intact.
Write storage dates on medication containers. Most OTC medications remain effective 1-3 years past expiration if stored properly; prescription medications should be replaced annually. Water in sealed, cool containers lasts indefinitely; rotate every 6-12 months.
Rotate canned goods annually using FIFO (First In, First Out). Canned goods last 3-5 years, but acidic foods degrade faster than low-acid foods. Discard dented, swollen, or rusted cans.
Redundancy in Material Selection
Use multiple storage methods: sealed plastic buckets for bulk items, waterproof containers for electronics and medications, glass jars for dry goods, and vacuum-sealed bags for textiles. Spread kits across multiple locations so one failure doesn't compromise your entire plan.
Budget Emergency Preparedness Checklist: What to Buy First
A structured monthly approach prevents sticker shock and ensures core preparedness. The strategy below allocates roughly $60-$80 per month over six months to reach Tier 1 and Tier 2 readiness.
Month-by-Month Build Plan
Month 1: Water and First Aid ($70-$80)
- Five 5-gallon food-grade water containers ($25-$35 total; $5-$7 each)
- Basic first aid kit or DIY assembly of bandages, gauze, antiseptic, pain relievers, antihistamines ($20-$30)
- Electrolyte powder packets for rehydration ($5-$10)
- Plastic storage container to house supplies ($10-$15)
Rationale: Water and first aid address 80% of common emergency needs. A person requires one gallon per day; five containers provide a five-day supply for one person.
Month 2: Lighting and Power ($65-$75)
- Two multi-function LED flashlights ($20-$30)
- 24-pack alkaline batteries (AA and AAA mix) ($12-$18)
- Hand-crank emergency radio with built-in flashlight ($25-$35)
- Headlamp with batteries ($10-$15)
Rationale: Multiple light sources prevent total darkness. A hand-crank radio provides news and weather alerts without battery dependency.
Month 3: Food and Nutrition ($60-$75)
- Canned goods: beans, vegetables, fruit, soup (12-15 cans, $15-$20)
- Dried pasta, rice, oats in bulk ($10-$15)
- Peanut butter, honey, nuts ($10-$15)
- Energy bars and granola ($8-$12)
- Manual can opener ($3-$5)
Rationale: Non-perishable food should reflect what your family eats. Include comfort foods for morale. A manual can opener is essential.
Month 4: Tools and Repair ($70-$85)
- Multi-tool or quality utility knife ($20-$35)
- 50-foot paracord ($8-$12)
- Duct tape and electrical tape ($5-$8)
- Adjustable wrench and hammer ($15-$20)
- Work gloves and safety glasses ($8-$12)
Rationale: Basic tools enable repairs and makeshift solutions. Paracord has dozens of emergency uses.
Month 5: Warmth and Shelter ($65-$80)
- Emergency thermal blankets (3-4 pack, $10-$15)
- Sleeping bag or emergency sleeping bag ($30-$45)
- Tarps or plastic sheeting ($10-$15)
- Matches and lighter ($3-$5)
Rationale: Thermal blankets are compact and inexpensive. A sleeping bag provides insulation if heating fails.
Month 6: Hygiene, Communication, and Backup ($70-$85)
- Toilet paper, wet wipes, hand sanitizer ($15-$20)
- Medications (backup prescriptions or over-the-counter pain relievers, allergy meds) ($15-$25)
- Power bank for phone charging ($20-$30)
- Cash in small bills ($10-$15)
Rationale: Hygiene prevents disease. Backup medications are critical for chronic conditions. A power bank keeps devices functional. Cash enables transactions if ATMs fail.
Total Six-Month Investment: $400-$480
This plan builds a functional household emergency kit for under $500, spreading purchases across six months to fit most budgets.
Prioritization Rationale
Each month prioritizes items addressing the most common emergencies: water and first aid prevent immediate harm; lighting and power restore basic function; food sustains energy; tools enable repairs; warmth prevents cold-related illness; hygiene and communication maintain health and connection.
Extend to 12 months at $40-$50 per month if needed, or focus on Tier 1 items first. Accelerate or add redundancy if budget allows.
Tier 1 (Essential Foundation), Months 1-3
- Water storage (5-gallon containers or collapsible bottles)
- Basic first aid kit
- Flashlight with extra batteries
- Battery-powered or hand-crank emergency radio
- Non-perishable food (canned goods, energy bars, dried fruit)
- Utility knife or multi-tool
- Manual can opener
Tier 2 (Core Preparedness), Months 4-6
- Additional water filtration method (optional; boiling works if you have fuel)
- Thermal blanket or emergency sleeping bag
- Paracord (50-100 feet)
- Duct tape and electrical tape
- Headlamp or additional lighting
- Hygiene supplies (wet wipes, toilet paper, hand sanitizer)
- Backup medications
- Power bank for charging devices
Tier 3 (Enhanced Readiness), Ongoing
- Extended food stockpile
- Important documents in waterproof container
- Backup communication devices
- Additional power banks or solar chargers
- First aid supplies beyond basics (tourniquets, trauma gauze, splints)
DIY Home Survival Kit Essentials You Can Assemble Today
Building your own kit gives you control over what goes in it and how it's organized. You don't need specialized containers or expensive pre-assembled packages.
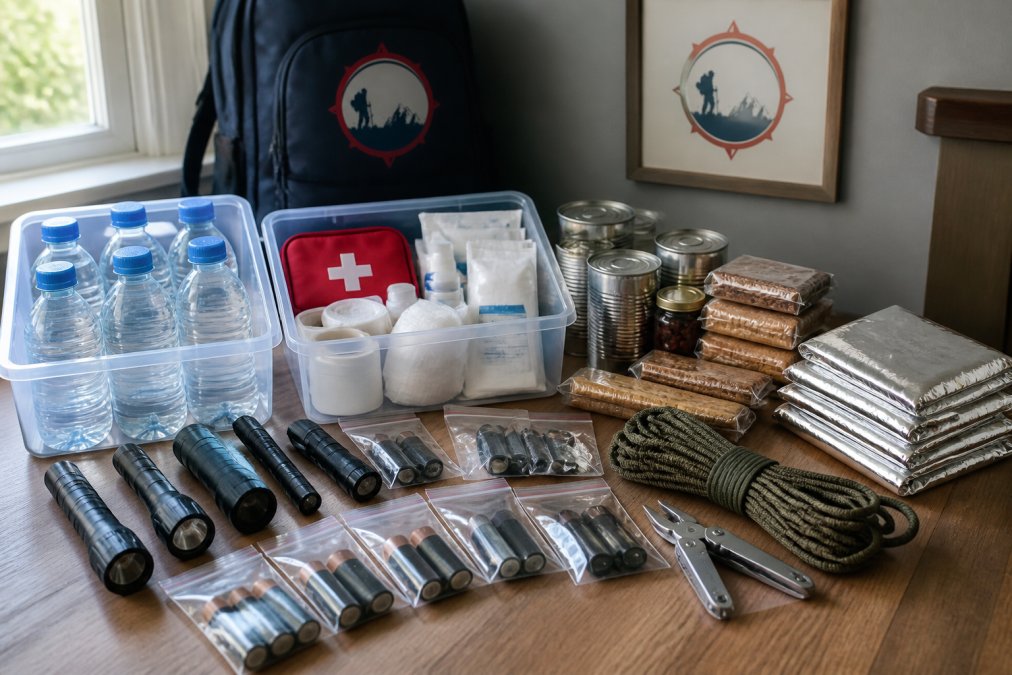
Start with sturdy plastic storage containers.
Water Storage, Filtration, and Food Stockpile Basics
Water is the foundation of preparedness. A person needs roughly one gallon per day; a family of four needs 120 gallons monthly.
Lighting, Power, and Communication for Home Emergencies
Reliable lighting is critical during outages. Headlamps free your hands; lanterns illuminate larger areas. Multiple light sources prevent total darkness if one fails.
Maintenance, Expiration Tracking, and Space-Saving Storage
A well-maintained kit works; a neglected kit creates false confidence. Establish a maintenance schedule.
Conclusion
Building affordable survival gear for home preparation isn't complicated, it's about starting somewhere and building consistently. Focus on the essentials first: water, first aid, lighting, and food. Organize supplies so they're accessible and maintainable. Track expiration dates and rotate items regularly.
Frequently Asked Questions
What are the most budget-friendly survival gear items for a home emergency kit?
Start with non-perishable food, bottled water, a battery-operated or hand-crank emergency radio, flashlights, extra batteries, a basic first aid kit, and a multi-tool. These core items provide essential protection without significant expense. Add thermal blankets, paracord, and a utility knife as your budget allows. Prioritize items with long shelf lives and multiple uses to maximize value.
How do I build a survival kit on a limited budget without sacrificing quality?
Focus on durability and versatility rather than quantity. Choose multi-purpose tools like a quality multi-tool that replaces several single-purpose items. Buy water storage containers that double as regular household items. Select first aid supplies in bulk from medical suppliers rather than pre-assembled kits. Assemble your kit gradually over several months instead of all at once, spreading costs across your budget.
What essential items should be in a 72-hour home emergency kit?
A 72-hour kit must include one gallon of water per person per day, non-perishable food requiring no cooking, a first aid kit, medications, a battery-operated emergency radio, flashlights with extra batteries, a multi-tool or utility knife, hygiene supplies, and a way to stay warm like blankets or thermal gear. Include important documents in a waterproof container and cash in small bills. Add paracord and basic tools for home repair and safety.
How can I ensure my affordable survival gear actually works when I need it?
Test all gear before storing it long-term. Check that flashlights work, batteries are fresh, and water containers seal properly. Rotate consumables like food and water every six months to one year. Keep a maintenance log tracking expiration dates and equipment checks. Store gear in a cool, dry location away from direct sunlight.